| 1 | # Passive journal centralization with encryption using self-signed certificates |
| 2 | |
| 3 | This page will guide you through creating a **passive** journal centralization setup using **self-signed certificates** for encryption and authorization. |
| 4 | |
| 5 | Once you centralize your infrastructure logs to a server, Netdata will automatically detect all the logs from all servers and organize them in sources. With the setup described in this document, on recent systemd versions, Netdata will automatically name all remote sources using the names of the clients, as they’re described at their certificates (on older versions, the names will be IPs or reverse DNS lookups of the IPs). |
| 6 | |
| 7 | A **passive** journal server waits for clients to push their metrics to it, so in this setup we will: |
| 8 | |
| 9 | 1. configure a certificate authority and issue self-signed certificates for your servers. |
| 10 | 2. configure `systemd-journal-remote` on the server, to listen for incoming connections. |
| 11 | 3. configure `systemd-journal-upload` on the clients, to push their logs to the server. |
| 12 | |
| 13 | Keep in mind that the authorization involved works like this: |
| 14 | |
| 15 | 1. The server (`systemd-journal-remote`) validates that the client (`systemd-journal-upload`) uses a trusted certificate (a certificate issued by the same certificate authority as its own). |
| 16 | So, **the server will accept logs from any client having a valid certificate**. |
| 17 | 2. The client (`systemd-journal-upload`) validates that the receiver (`systemd-journal-remote`) uses a trusted certificate (like the server does) and it also checks that the hostname or IP of the URL specified to its configuration, matches one of the names or IPs of the server it gets connected to. So, **the client does a validation that it connected to the right server**, using the URL hostname against the names and IPs of the server on its certificate. |
| 18 | |
| 19 | This means that if both certificates are issued by the same certificate authority, only the client can potentially reject the server. |
| 20 | |
| 21 | ## Self-signed certificates |
| 22 | |
| 23 | To simplify the process of creating and managing self-signed certificates, we have created [this bash script](https://github.com/netdata/netdata/blob/master/src/collectors/systemd-journal.plugin/systemd-journal-self-signed-certs.sh). |
| 24 | |
| 25 | This helps to also automate the distribution of the certificates to your servers (it generates a new bash script for each of your servers, which includes everything required, including the certificates). |
| 26 | |
| 27 | We suggest keeping this script and all the involved certificates at the journal centralization server, in the directory `/etc/ssl/systemd-journal`, so that you can make future changes as required. If you prefer to keep the certificate authority and all the certificates at a more secure location, use the script on that location. |
| 28 | |
| 29 | On the server that will issue the certificates (usually the centralization server), do the following: |
| 30 | |
| 31 | ```bash |
| 32 | # install systemd-journal-remote to add the users and groups required and openssl for the certs |
| 33 | # change this according to your distro |
| 34 | sudo apt-get install systemd-journal-remote openssl |
| 35 | |
| 36 | # download the script and make it executable |
| 37 | curl >systemd-journal-self-signed-certs.sh "https://raw.githubusercontent.com/netdata/netdata/master/src/collectors/systemd-journal.plugin/systemd-journal-self-signed-certs.sh" |
| 38 | chmod 750 systemd-journal-self-signed-certs.sh |
| 39 | ``` |
| 40 | |
| 41 | To create certificates for your servers, run this: |
| 42 | |
| 43 | ```bash |
| 44 | sudo ./systemd-journal-self-signed-certs.sh "server1" "DNS:hostname1" "IP:10.0.0.1" |
| 45 | ``` |
| 46 | |
| 47 | Where: |
| 48 | |
| 49 | - `server1` is the canonical name of the server. On newer systemd version, this name will be used by `systemd-journal-remote` and Netdata when you view the logs on the dashboard. |
| 50 | - `DNS:hostname1` is a DNS name that the server is reachable at. Add `"DNS:xyz"` multiple times to define multiple DNS names for the server. |
| 51 | - `IP:10.0.0.1` is an IP that the server is reachable at. Add `"IP:xyz"` multiple times to define multiple IPs for the server. |
| 52 | |
| 53 | Repeat this process to create the certificates for all your servers. You can add servers as required, at any time in the future. |
| 54 | |
| 55 | Existing certificates are never re-generated. Typically, certificates need to be revoked and new ones to be issued. But `systemd-journal-remote` tools don’t support handling revocations. So, the only option you have to re-issue a certificate is to delete its files in `/etc/ssl/systemd-journal` and run the script again to create a new one. |
| 56 | |
| 57 | Once you run the script of each of your servers, in `/etc/ssl/systemd-journal` you will find shell scripts named `runme-on-XXX.sh`, where `XXX` are the canonical names of your servers. |
| 58 | |
| 59 | These `runme-on-XXX.sh` include everything to install the certificates, fix their file permissions to be accessible by `systemd-journal-remote` and `systemd-journal-upload`, and update `/etc/systemd/journal-remote.conf` and `/etc/systemd/journal-upload.conf`. |
| 60 | |
| 61 | You can copy and paste (or `scp`) these scripts on your server and each of your clients: |
| 62 | |
| 63 | ```bash |
| 64 | sudo scp /etc/ssl/systemd-journal/runme-on-XXX.sh XXX:/tmp/ |
| 65 | ``` |
| 66 | |
| 67 | For the rest of this guide, we assume that you’ve copied the right `runme-on-XXX.sh` at the `/tmp` of all the servers for which you issued certificates. |
| 68 | |
| 69 | ### note about certificates file permissions |
| 70 | |
| 71 | It is worth noting that `systemd-journal` certificates need to be owned by `systemd-journal-remote:systemd-journal`. |
| 72 | |
| 73 | Both the user `systemd-journal-remote` and the group `systemd-journal` are automatically added by the `systemd-journal-remote` package. However, `systemd-journal-upload` (and `systemd-journal-gatewayd` - that is not used in this guide) use dynamic users. Thankfully they’re added to the `systemd-journal` remote group. |
| 74 | |
| 75 | So, by having the certificates owned by `systemd-journal-remote:systemd-journal`, satisfies both `systemd-journal-remote` which is not in the `systemd-journal` group, and `systemd-journal-upload` (and `systemd-journal-gatewayd`) which use dynamic users. |
| 76 | |
| 77 | You don't need to do anything about it (the scripts take care of everything), but it is worth noting how this works. |
| 78 | |
| 79 | ## Server configuration |
| 80 | |
| 81 | On the centralization server install `systemd-journal-remote`: |
| 82 | |
| 83 | ```bash |
| 84 | # change this according to your distro |
| 85 | sudo apt-get install systemd-journal-remote |
| 86 | ``` |
| 87 | |
| 88 | Make sure the journal transfer protocol is `https`: |
| 89 | |
| 90 | ```bash |
| 91 | sudo cp /lib/systemd/system/systemd-journal-remote.service /etc/systemd/system/ |
| 92 | |
| 93 | # edit it to make sure it says: |
| 94 | # --listen-https=-3 |
| 95 | # not: |
| 96 | # --listen-http=-3 |
| 97 | sudo nano /etc/systemd/system/systemd-journal-remote.service |
| 98 | |
| 99 | # reload systemd |
| 100 | sudo systemctl daemon-reload |
| 101 | ``` |
| 102 | |
| 103 | Optionally, if you want to change the port (the default is `19532`), edit `systemd-journal-remote.socket` |
| 104 | |
| 105 | ```bash |
| 106 | # edit the socket file |
| 107 | sudo systemctl edit systemd-journal-remote.socket |
| 108 | ``` |
| 109 | |
| 110 | and add the following lines into the instructed place, and choose your desired port; save and exit. |
| 111 | |
| 112 | ```bash |
| 113 | [Socket] |
| 114 | ListenStream=<DESIRED_PORT> |
| 115 | ``` |
| 116 | |
| 117 | Next, run the `runme-on-XXX.sh` script on the server: |
| 118 | |
| 119 | ```bash |
| 120 | # if you run the certificate authority on the server: |
| 121 | sudo /etc/ssl/systemd-journal/runme-on-XXX.sh |
| 122 | |
| 123 | # if you run the certificate authority elsewhere, |
| 124 | # assuming you have coped the runme-on-XXX.sh script (as described above): |
| 125 | sudo bash /tmp/runme-on-XXX.sh |
| 126 | ``` |
| 127 | |
| 128 | This will install the certificates in `/etc/ssl/systemd-journal`, set the right file permissions, and update `/etc/systemd/journal-remote.conf` and `/etc/systemd/journal-upload.conf` to use the right certificate files. |
| 129 | |
| 130 | Finally, enable it, so that it will start automatically upon receiving a connection: |
| 131 | |
| 132 | ```bash |
| 133 | # enable systemd-journal-remote |
| 134 | sudo systemctl enable --now systemd-journal-remote.socket |
| 135 | sudo systemctl enable systemd-journal-remote.service |
| 136 | ``` |
| 137 | |
| 138 | `systemd-journal-remote` is now listening for incoming journals from remote hosts. |
| 139 | |
| 140 | > When done, remember to `rm /tmp/runme-on-*.sh` to make sure your certificates are secure. |
| 141 | |
| 142 | ## Client configuration |
| 143 | |
| 144 | On the clients, install `systemd-journal-remote` (it includes `systemd-journal-upload`): |
| 145 | |
| 146 | ```bash |
| 147 | # change this according to your distro |
| 148 | sudo apt-get install systemd-journal-remote |
| 149 | ``` |
| 150 | |
| 151 | Edit `/etc/systemd/journal-upload.conf` and set the IP address and the port of the server, like so: |
| 152 | |
| 153 | ```text |
| 154 | [Upload] |
| 155 | URL=https://centralization.server.ip:19532 |
| 156 | ``` |
| 157 | |
| 158 | Make sure that `centralization.server.ip` is one of the `DNS:` or `IP:` parameters you defined when you created the centralization server certificates. If it is not, the client may reject to connect. |
| 159 | |
| 160 | Next, edit `systemd-journal-upload.service`, and add `Restart=always` to make sure the client will keep trying to push logs, even if the server is temporarily not there, like this: |
| 161 | |
| 162 | ```bash |
| 163 | sudo systemctl edit systemd-journal-upload.service |
| 164 | ``` |
| 165 | |
| 166 | At the top, add: |
| 167 | |
| 168 | ```text |
| 169 | [Service] |
| 170 | Restart=always |
| 171 | ``` |
| 172 | |
| 173 | Enable `systemd-journal-upload.service`, like this: |
| 174 | |
| 175 | ```bash |
| 176 | sudo systemctl enable systemd-journal-upload.service |
| 177 | ``` |
| 178 | |
| 179 | Assuming that you have in `/tmp` the relevant `runme-on-XXX.sh` script for this client, run: |
| 180 | |
| 181 | ```bash |
| 182 | sudo bash /tmp/runme-on-XXX.sh |
| 183 | ``` |
| 184 | |
| 185 | This will install the certificates in `/etc/ssl/systemd-journal`, set the right file permissions, and update `/etc/systemd/journal-remote.conf` and `/etc/systemd/journal-upload.conf` to use the right certificate files. |
| 186 | |
| 187 | Finally, restart `systemd-journal-upload.service`: |
| 188 | |
| 189 | ```bash |
| 190 | sudo systemctl restart systemd-journal-upload.service |
| 191 | ``` |
| 192 | |
| 193 | The client should now be pushing logs to the central server. |
| 194 | |
| 195 | > When done, remember to `rm /tmp/runme-on-*.sh` to make sure your certificates are secure. |
| 196 | |
| 197 | Here it is in action, in Netdata: |
| 198 | |
| 199 | 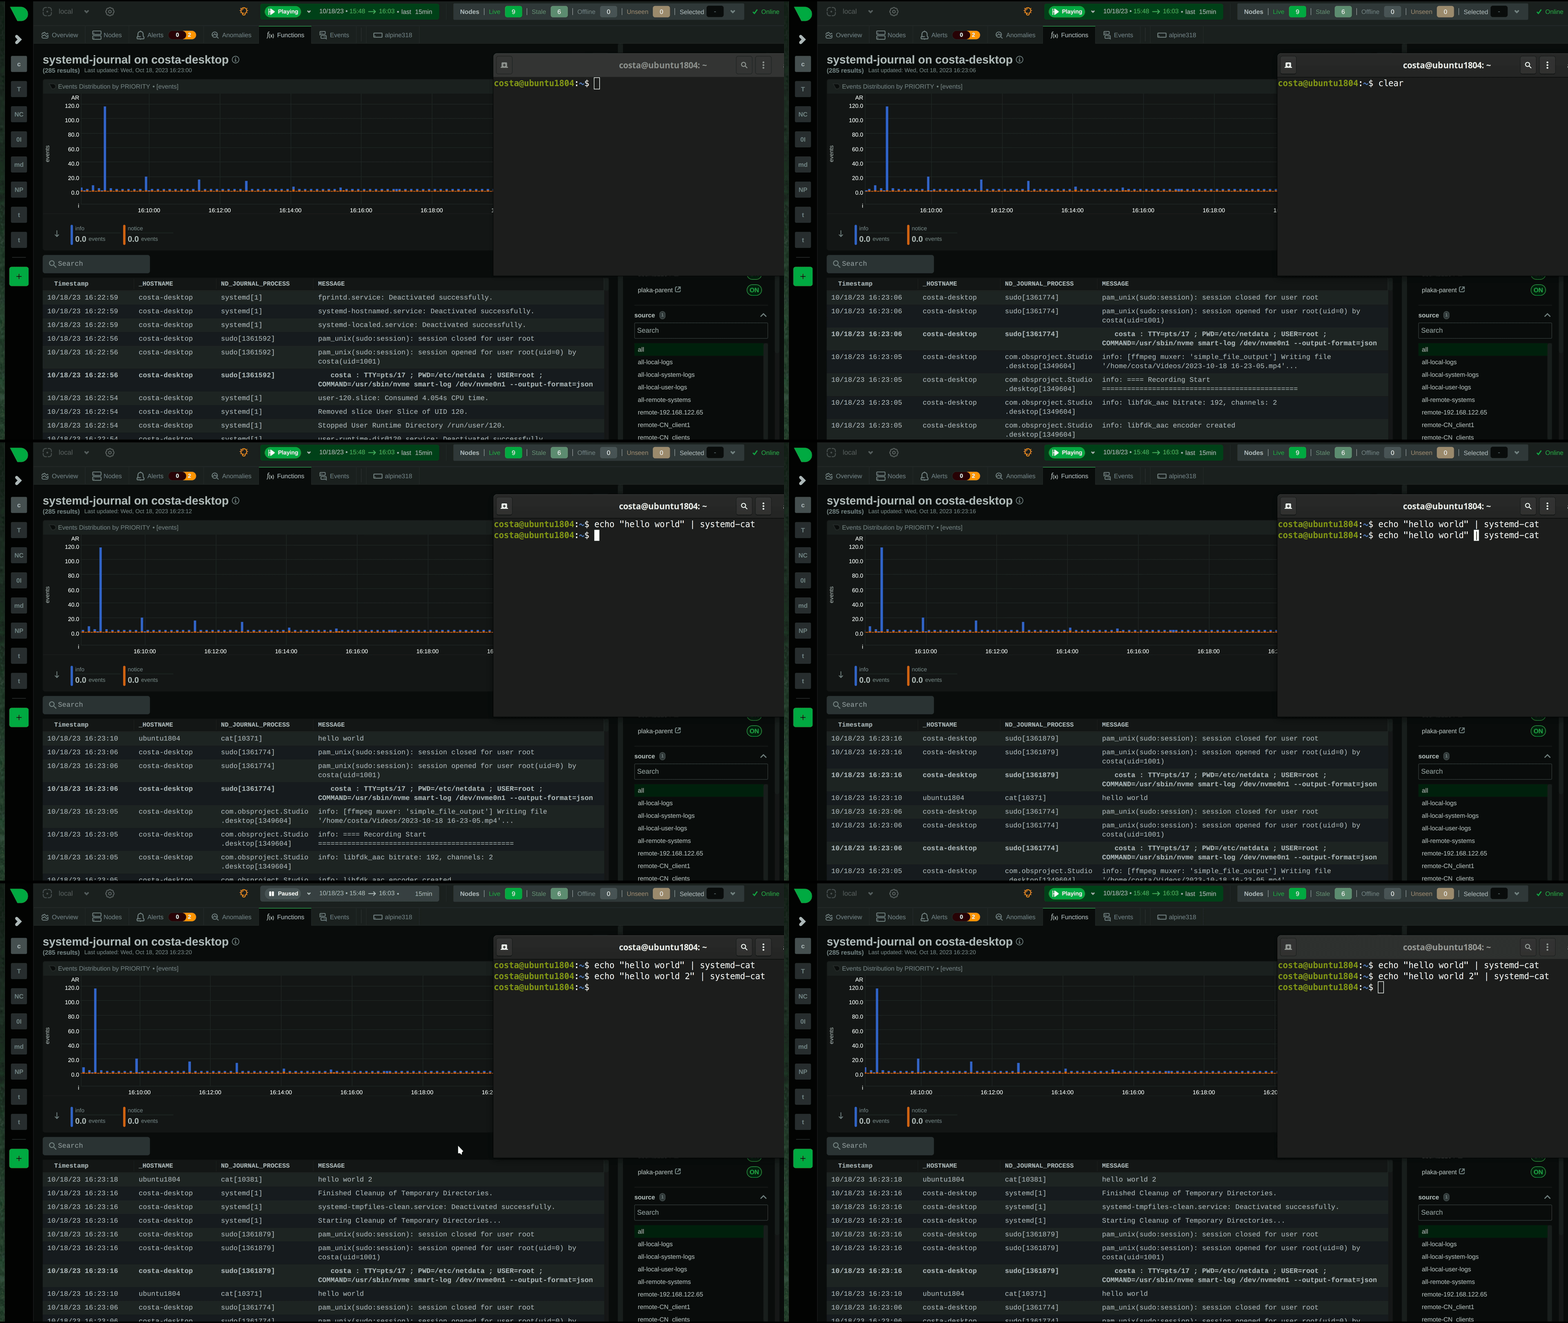 |
| 200 | |
| 201 | ## Verify it works |
| 202 | |
| 203 | To verify that the central server is receiving logs, run this on the central server: |
| 204 | |
| 205 | ```bash |
| 206 | sudo ls -l /var/log/journal/remote/ |
| 207 | ``` |
| 208 | |
| 209 | Depending on the `systemd` version you use, you should see new files from the clients' canonical names (as defined at their certificates) or IPs. |
| 210 | |
| 211 | Also, `systemctl status systemd-journal-remote` should show something like this: |
| 212 | |
| 213 | ```bash |
| 214 | systemd-journal-remote.service - Journal Remote Sink Service |
| 215 | Loaded: loaded (/etc/systemd/system/systemd-journal-remote.service; indirect; preset: disabled) |
| 216 | Active: active (running) since Sun 2023-10-15 14:29:46 EEST; 2h 24min ago |
| 217 | TriggeredBy: ● systemd-journal-remote.socket |
| 218 | Docs: man:systemd-journal-remote(8) |
| 219 | man:journal-remote.conf(5) |
| 220 | Main PID: 2118153 (systemd-journal) |
| 221 | Status: "Processing requests..." |
| 222 | Tasks: 1 (limit: 154152) |
| 223 | Memory: 2.2M |
| 224 | CPU: 71ms |
| 225 | CGroup: /system.slice/systemd-journal-remote.service |
| 226 | └─2118153 /usr/lib/systemd/systemd-journal-remote --listen-https=-3 --output=/var/log/journal/remote/ |
| 227 | ``` |
| 228 | |
| 229 | Note the `status: "Processing requests..."` and the PID under `CGroup`. |
| 230 | |
| 231 | On the client `systemctl status systemd-journal-upload` should show something like this: |
| 232 | |
| 233 | ```bash |
| 234 | ● systemd-journal-upload.service - Journal Remote Upload Service |
| 235 | Loaded: loaded (/lib/systemd/system/systemd-journal-upload.service; enabled; vendor preset: disabled) |
| 236 | Drop-In: /etc/systemd/system/systemd-journal-upload.service.d |
| 237 | └─override.conf |
| 238 | Active: active (running) since Sun 2023-10-15 10:39:04 UTC; 3h 17min ago |
| 239 | Docs: man:systemd-journal-upload(8) |
| 240 | Main PID: 4169 (systemd-journal) |
| 241 | Status: "Processing input..." |
| 242 | Tasks: 1 (limit: 13868) |
| 243 | Memory: 3.5M |
| 244 | CPU: 1.081s |
| 245 | CGroup: /system.slice/systemd-journal-upload.service |
| 246 | └─4169 /lib/systemd/systemd-journal-upload --save-state |
| 247 | ``` |
| 248 | |
| 249 | Note the `Status: "Processing input..."` and the PID under `CGroup`. |